Sign In / Sign Up
 Orders
 Product Keys
 Downloads

 Go to United States of America - English (USD)
Steps to Activate Windows Server 2019
Visit the account section on our site. Hover over Profile (without clicking) and a dropdown will appear. Choose Product Keys.
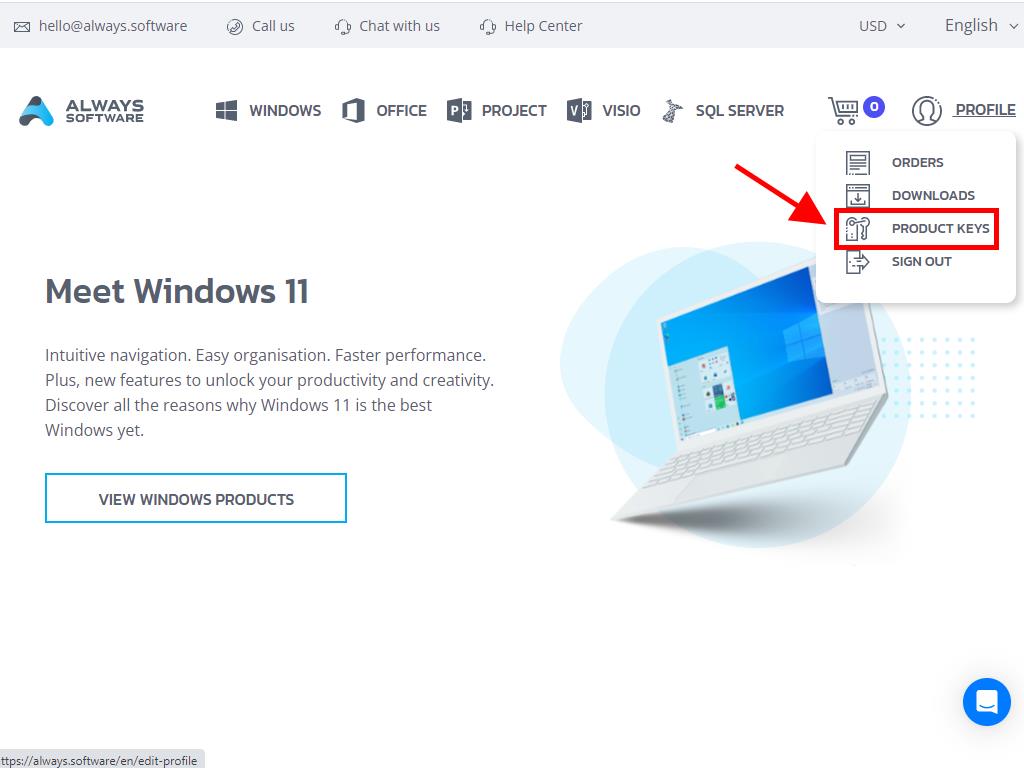
Here you will locate the product key required to activate Windows Server 2019.
If you are reactivating an already installed Windows Server, ensure it is not in the evaluation period and proceed as follows:
Note: It's recommended to download and install all software updates before initiating activation.
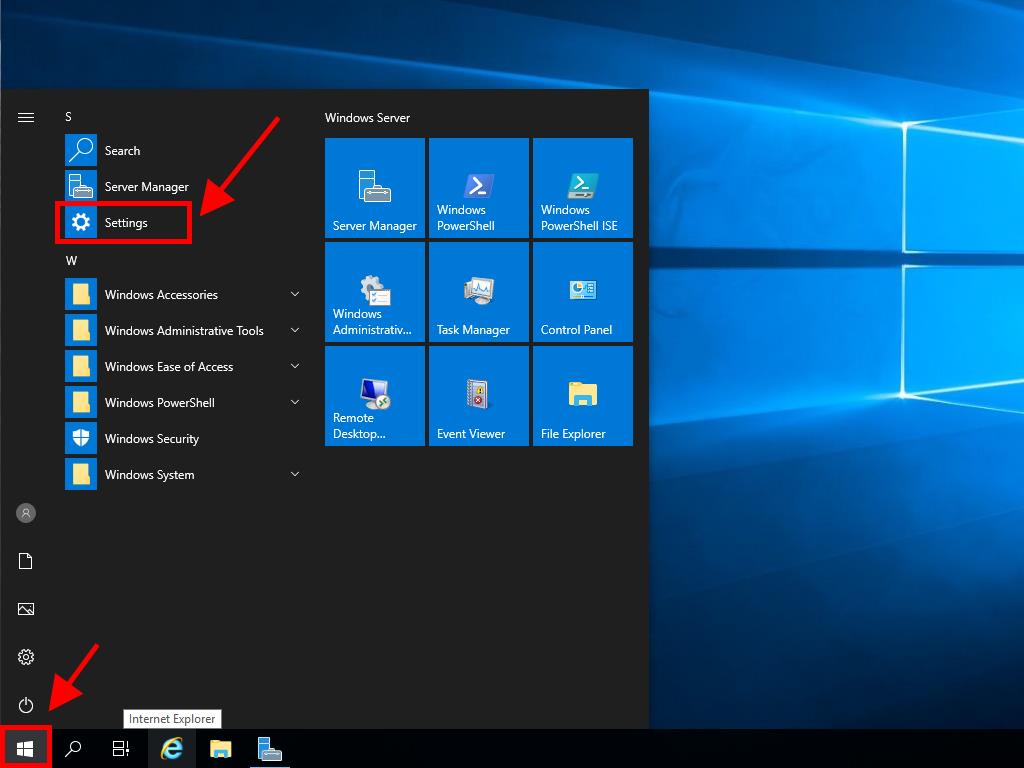
- After installing all available updates for Windows Server, select the Start button and click Settings.
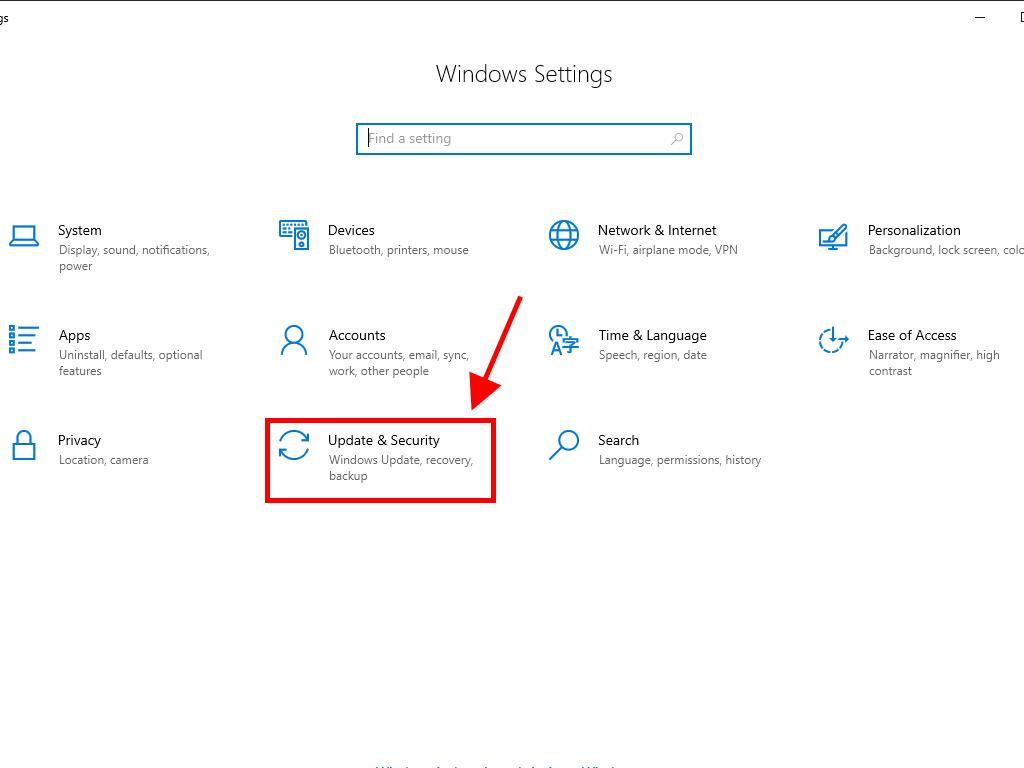
- Next, click Update & Security.
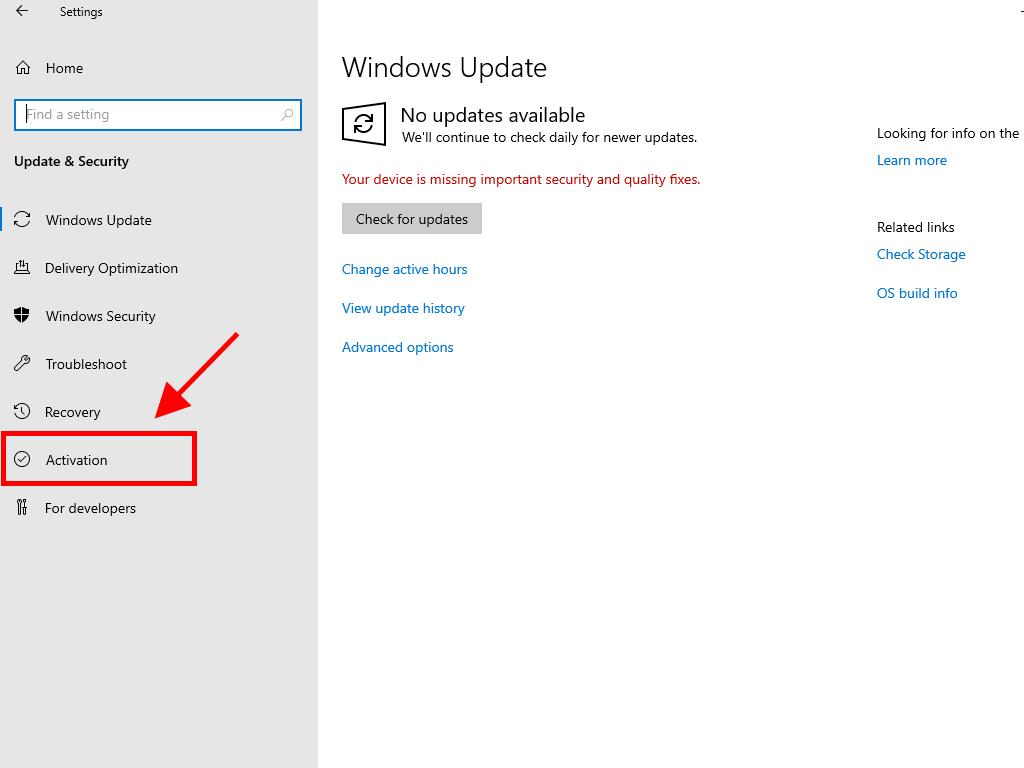
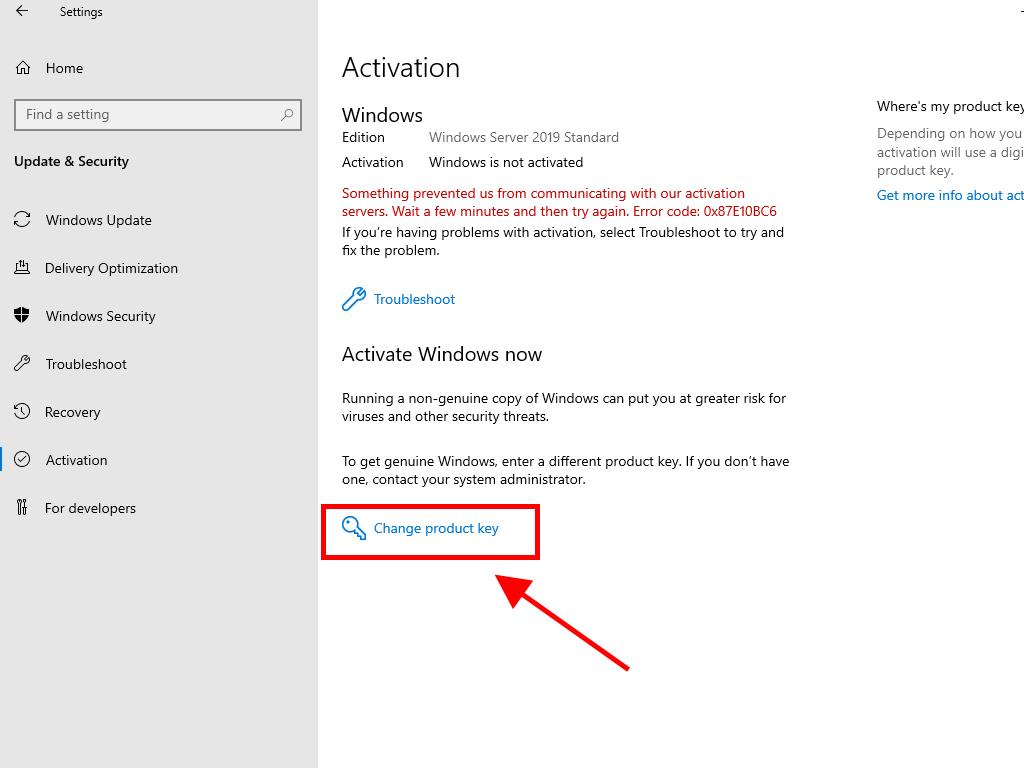
- Select Activation.
- Then, click Change product key.
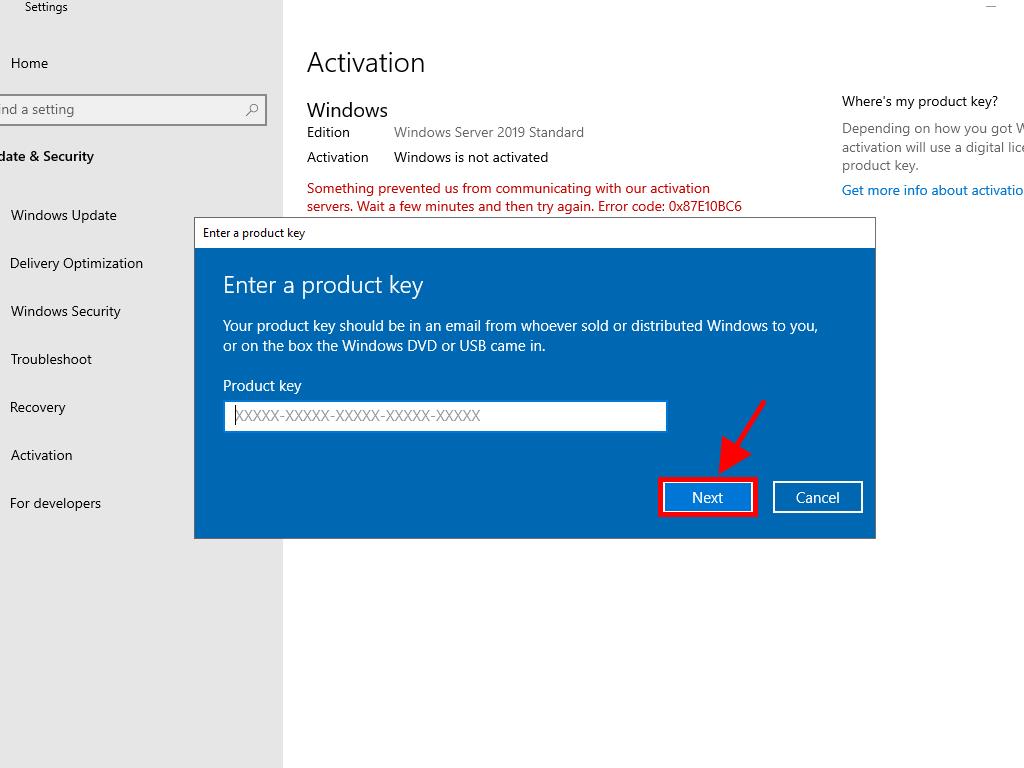
- Enter your product key and click Next.
Note: If you see the message The product key you entered did not work. Check the product key and try again, or try a different one, your system might be an evaluation version or installed on a different activation channel. We recommend contacting our support team to identify and solve the issue. For personalised assistance, click here.
If your system is an evaluation version, follow this procedure:
Note: Ensure the server has all updates installed to avoid activation errors.
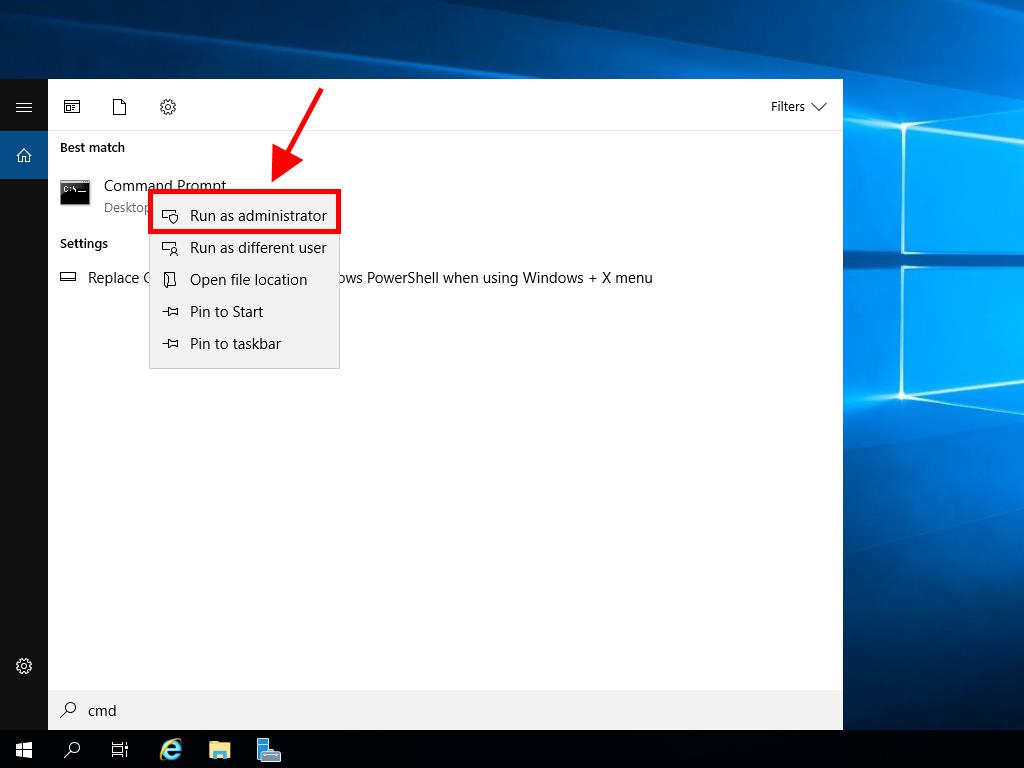
- In the taskbar search box, type CMD. When Command Prompt appears, right-click and choose Run as administrator.
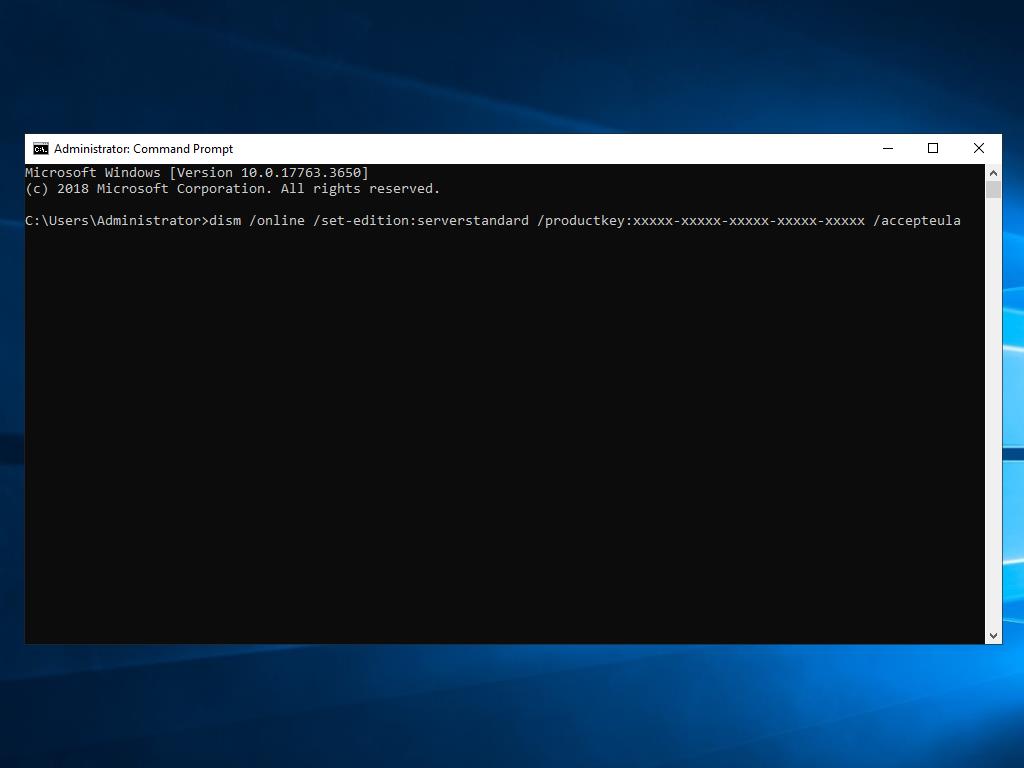
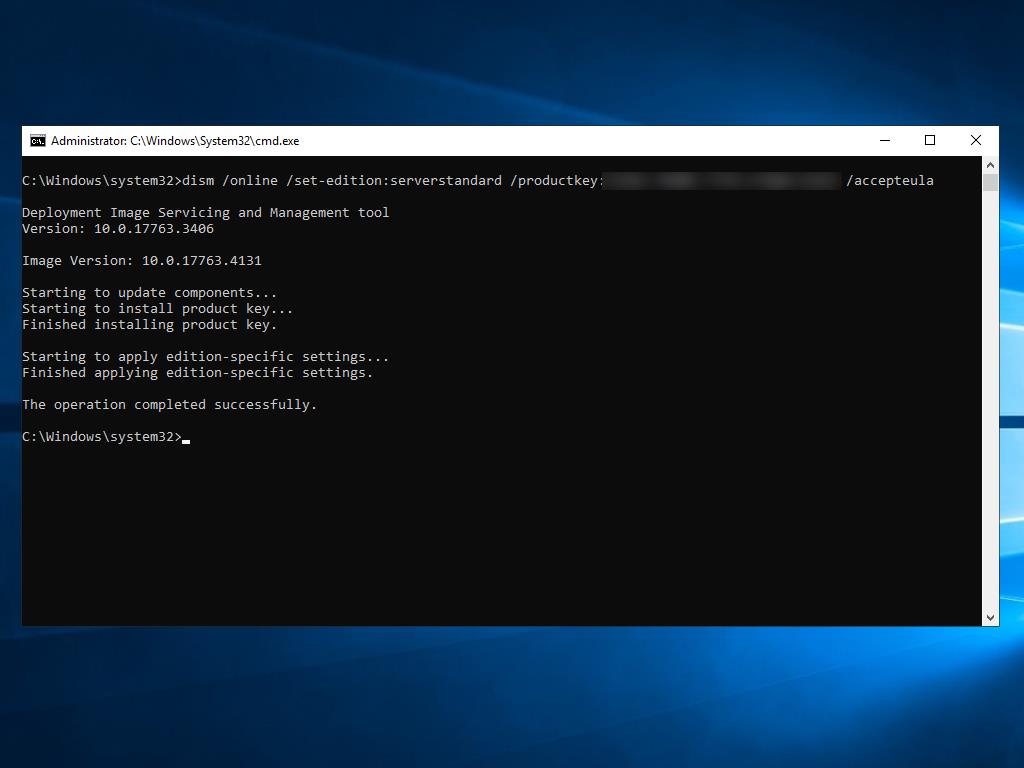
- Type this command: dism /online /set-edition:serverstandard /productkey:XXXXX-XXXXX-XXXXX-XXXXX-XXXXX /accepteula. Replace the Xs with your product key and press Enter.
- After the activation, restart the server.
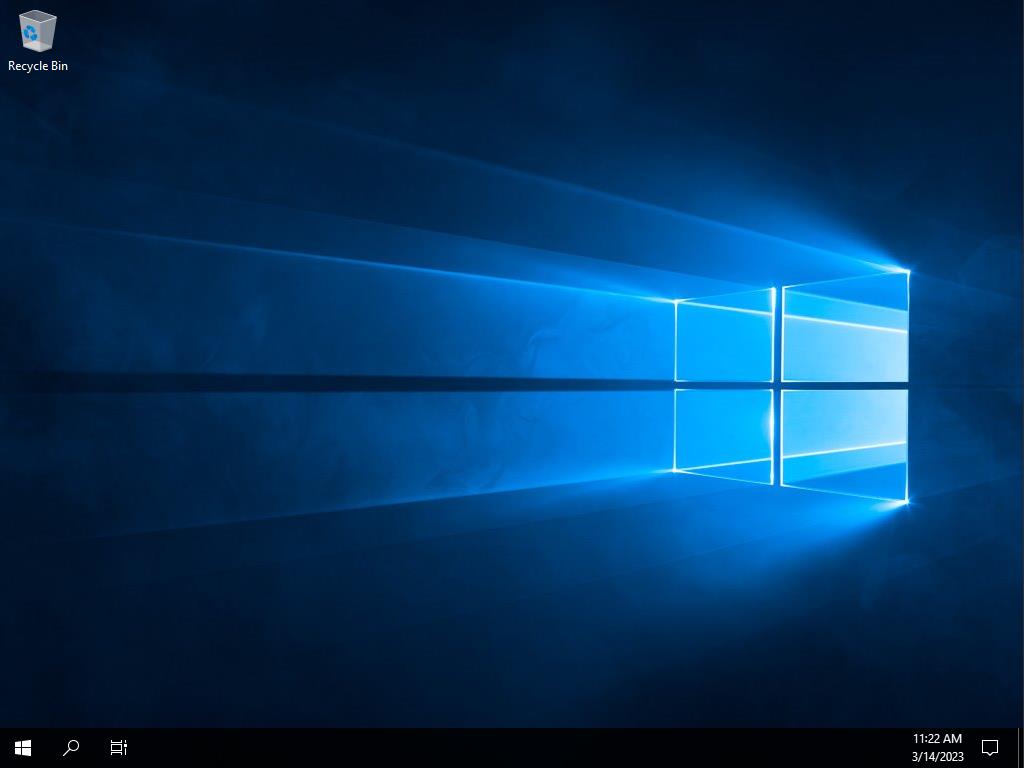
- After restarting, your Windows Server 2019 will be activated. Verify this by checking the bottom right corner where the Windows Server Standard Evaluation mark should be gone.