Crafting Your Windows 10 Installation Media
To initiate the Windows 10 setup, first, secure the .iso file and then proceed to create a bootable USB.
Reminder: A USB stick with at least 8 GB of capacity is required.
Here are the tools you can employ:
Rufus
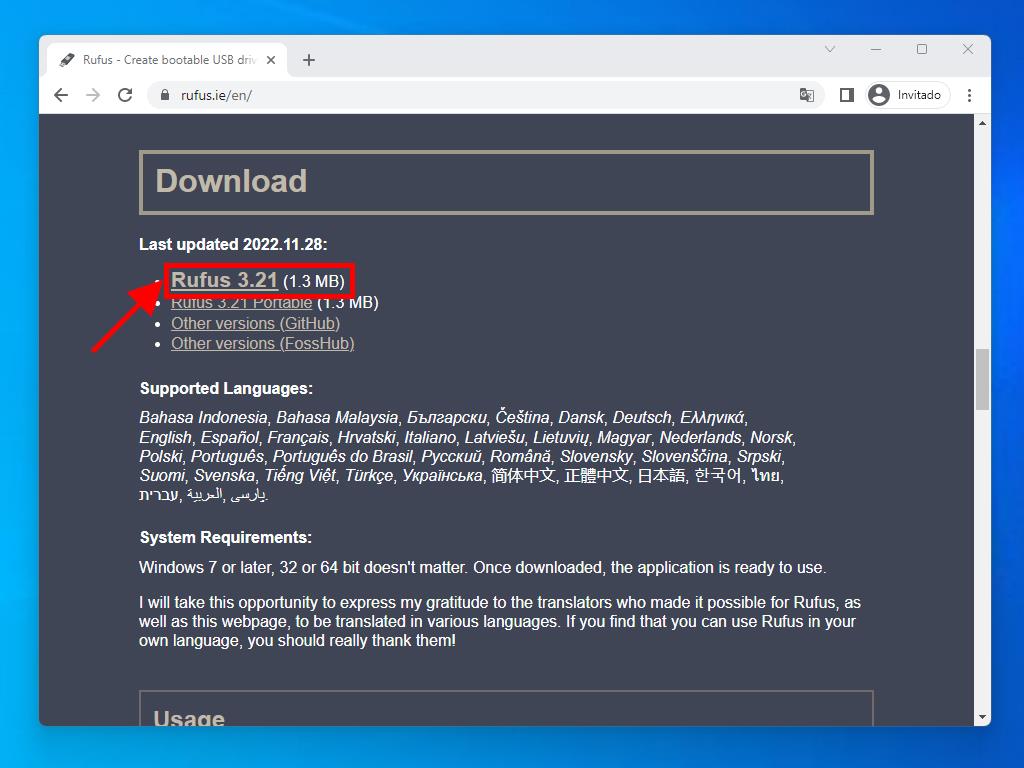
- Click here to download Rufus for free.
- Navigate below to find the latest version of Rufus under the Download section.
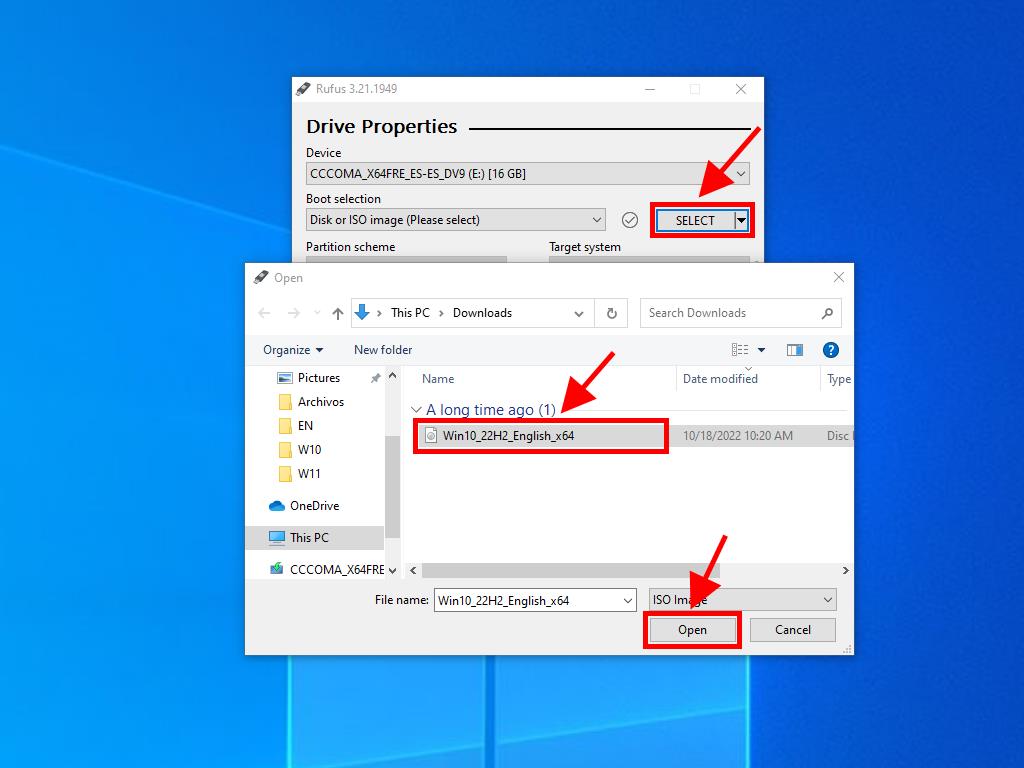
- Insert the USB and launch the Rufus application.
- Use the Select button to locate your Windows 10 .iso file.
- Hit Start to commence.
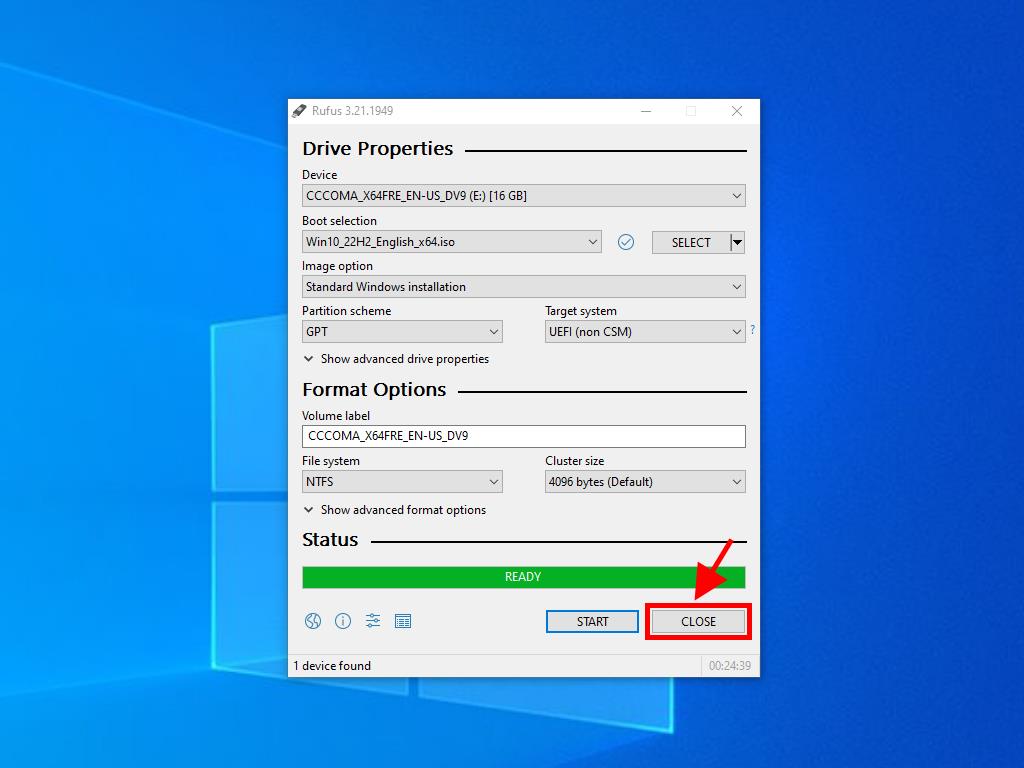
- After completion (progress indicator at 100%), select Close; your device is now ready for Windows 10 installation.
Attention: A customization window titled ‘Customize Windows Installation’ will pop up; opt for Disable Data Collection and allow Rufus to configure the USB drive.
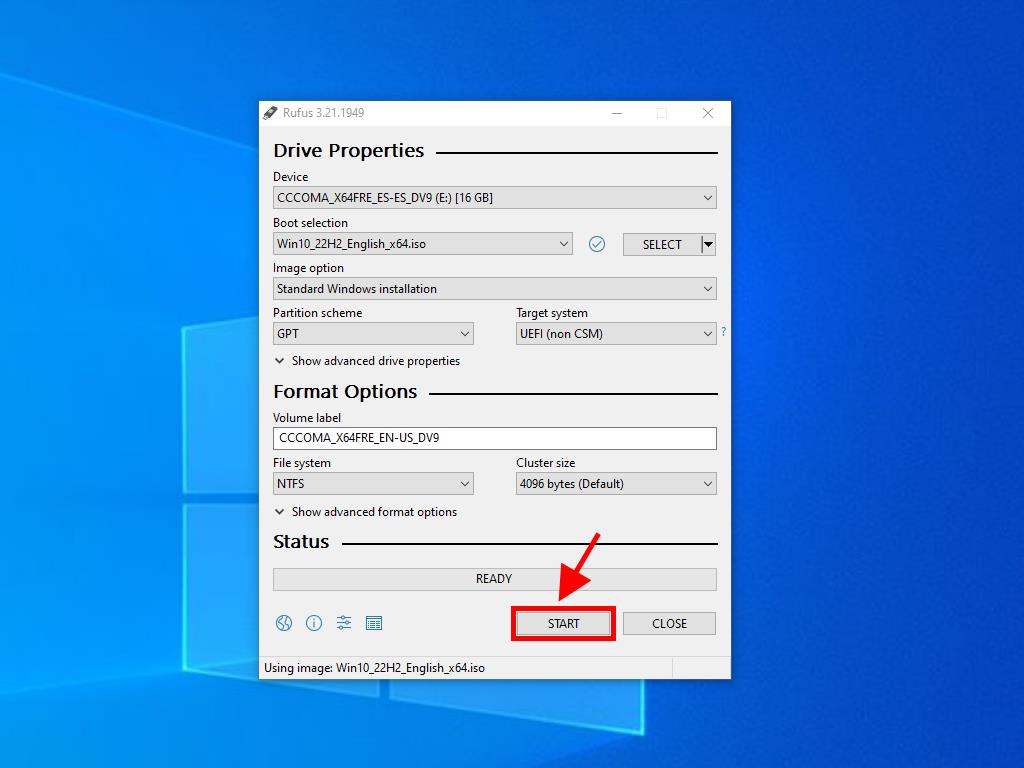
Note: Opt for GPT partition scheme for PCs post-2020 and MBR for earlier models.
MediaCreationTool
- Download MediaCreationTool at no cost here.
- Consent to the terms to proceed with its setup.
- Upon agreement, a dialogue box will appear. Choose Create installation media and press Next.
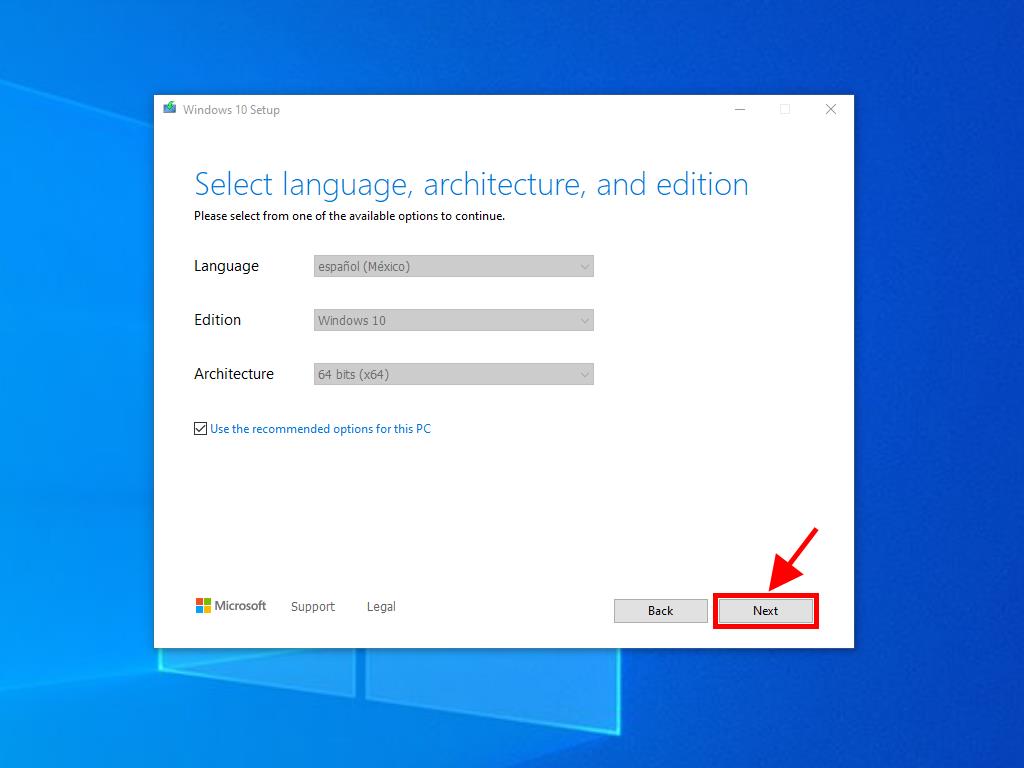
- Select your desired language, edition, and architecture settings.
- Following your selections, opt for either USB flash drive or .iso file, then click Next. This action triggers the setup on your connected USB drive.
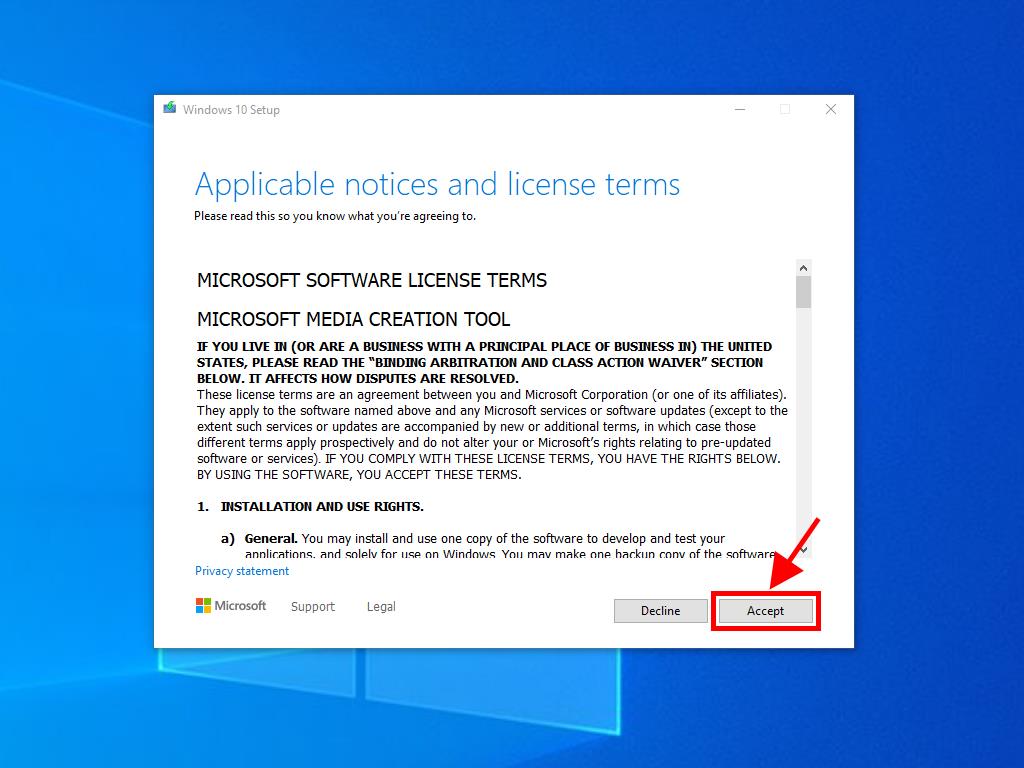
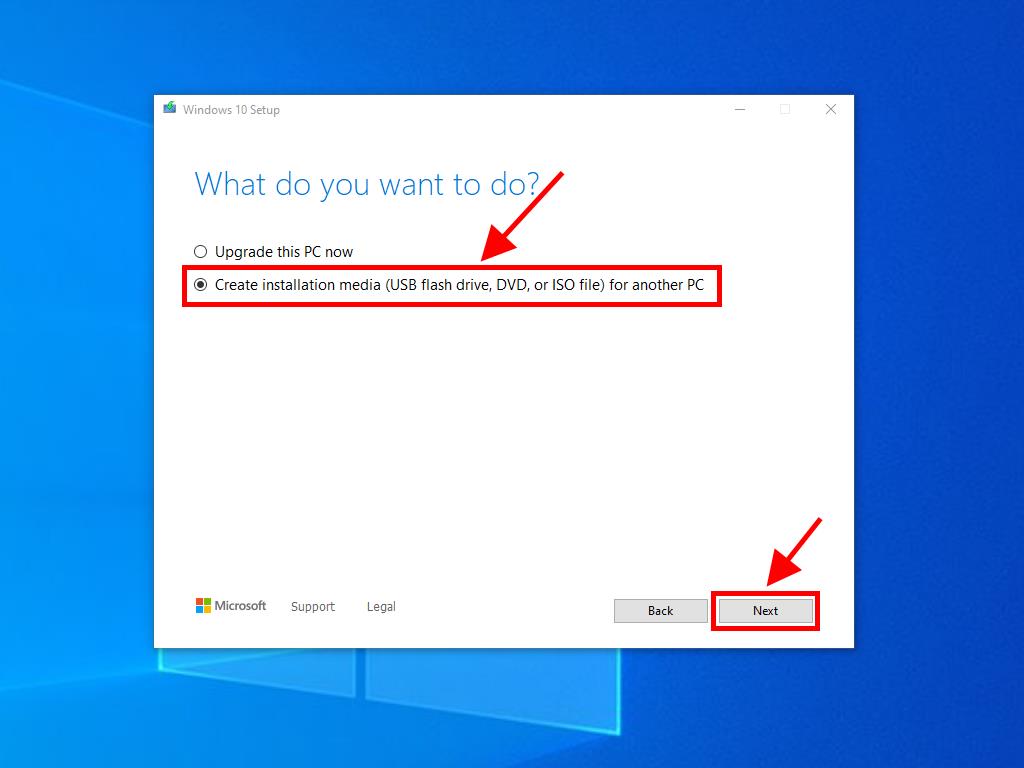
If the default language or edition doesn’t match your preference, deselect the use recommended options for this PC box to customize your choice.
Should you not see your USB drive listed, close the application and restart it, keeping the USB connected. Remember, all data on the USB will be erased.
 Sign In / Sign Up
 Orders
 Product Keys
 Downloads

 Go to United States of America - English (USD)